In the realm of plumbing solutions, innovation continues to play a pivotal role in addressing the challenges of modern living spaces. One such innovation that has gained significant popularity is the Installation Saniflo plumbing diagram system.
Renowned for its versatility and efficiency, the Saniflo system offers a unique solution for homeowners seeking to add bathrooms, kitchens, or laundry rooms in unconventional spaces without requiring extensive renovations.
At the heart of the Saniflo system lies its ingenious design, which allows for the efficient disposal of wastewater even in areas where traditional plumbing is impractical. But what exactly does the installation of a Saniflo plumbing system entail? Let’s delve into the intricacies of its plumbing diagram to gain a better understanding.
Understanding Saniflo Plumbing Systems
Saniflo plumbing systems are innovative solutions designed to allow the installation of toilets, sinks, showers, and other plumbing fixtures where conventional plumbing is impractical. These systems utilize a macerator to break down waste and pump it away, making them ideal for basement bathrooms, home additions, and other challenging spaces.
Saniflo plumbing systems offer flexibility and convenience, eliminating the need for extensive excavation and costly plumbing modifications. With proper installation, they provide efficient and reliable wastewater management for residential and commercial applications.
You May Know More About: Alvarado Plumber for Slab Leak Repair: Your Trusted Partner
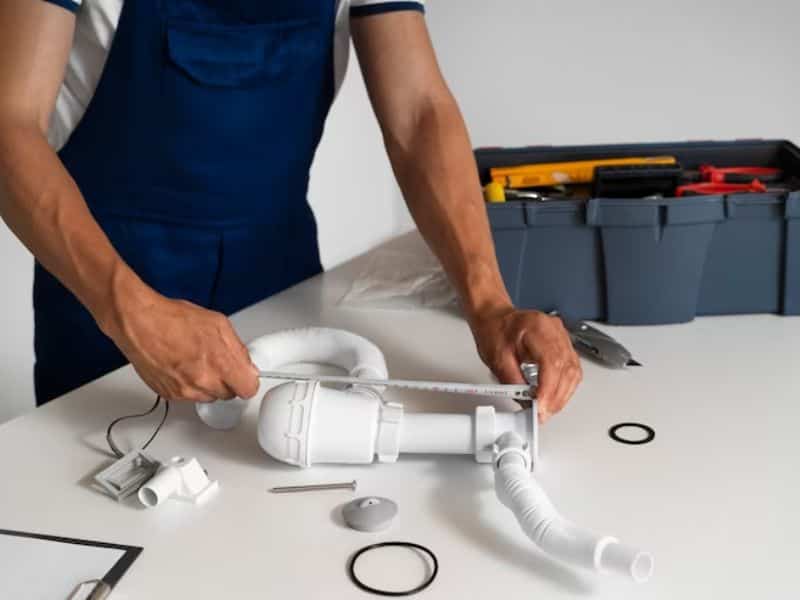
Components of a Saniflo Plumbing System
Before diving into the installation process, it’s essential to familiarize ourselves with the key components of a Saniflo plumbing system:
- Macerator Pump: The cornerstone of the Saniflo system, the macerator pump, grinds solid waste into a fine slurry that can be easily discharged through small-diameter pipes.
- Check Valve: This valve prevents backflow, ensuring that wastewater flows in the desired direction and prevents any potential flooding or damage.
- Small-Diameter Pipes: Unlike traditional plumbing systems that rely on large-diameter pipes, Saniflo systems utilize smaller pipes, making them ideal for installations in tight spaces.
- Sink, Toilet, or Shower: These fixtures are connected to the Saniflo system and allow for the efficient disposal of wastewater.
Preparing for Installation
Before diving into the installation process, gathering all the necessary tools and materials is essential. Here’s a checklist to ensure you’re fully prepared:
Materials Needed
- Saniflo plumbing system kit
- PVC pipes and fittings
- Silicone sealant
- Screwdriver
- Adjustable wrench
- Pipe cutter
- Level
Steps for Preparation
- Read the Manual: Familiarize yourself with the installation instructions provided by the manufacturer.
- Inspect the Site: Evaluate the installation area to ensure it meets the requirements for a Saniflo system.
- Gather Tools and Materials: Assemble all the tools and materials needed for installation.
- Plan the Layout: Determine the placement of the plumbing fixtures and map out the route for the pipes.
Installation Saniflo Plumbing Diagram Process
Installing a Saniflo plumbing system typically involves the following steps:
- Site Assessment: Assess the installation site to determine the best location for the Saniflo unit. Consider factors such as proximity to existing plumbing lines, access to electrical outlets, and structural considerations.
- Preparation: Before beginning the installation process, ensure that all necessary tools and materials are on hand. This may include a drill, pipe cutter, wrenches, and PVC pipes.
- Positioning the Unit: Place the Saniflo unit in the chosen location, ensuring that it is level and securely anchored to the floor.
- Connecting Fixtures: Connect the sink, toilet, or shower to the Saniflo unit using the appropriate pipes and fittings. Ensure that all connections are watertight to prevent leaks.
- Electrical Connection: Connect the Saniflo unit to a dedicated electrical outlet as per the manufacturer’s instructions. This provides power to the macerator pump and other electrical components.
- Testing: Once the installation is complete, perform a series of tests to ensure the system functions correctly. This may include running water through the fixtures and checking for any leaks or unusual noises.
- Final Adjustments: Make any necessary adjustments to the installation, such as fine-tuning pipe connections or adjusting the unit’s positioning, to ensure optimal performance.
You May Know More: 10 Best Plumbers In My Area That Give Free Estimates
Benefits of Saniflo Plumbing Systems
- Versatility: Saniflo systems can be installed in virtually any space, making them ideal for basement conversions, granny flats, or other areas where traditional plumbing is impractical.
- Cost-Effective: Compared to traditional plumbing installations, Saniflo systems require less time, labor, and materials, resulting in cost savings for homeowners.
- Minimal Disruption: Because Saniflo systems require minimal excavation and construction, they cause less disruption to the home during installation.
- Ease of Maintenance: Saniflo systems are designed for easy maintenance, with accessible components that can be serviced or replaced as needed.
In conclusion, installing a Saniflo plumbing system offers a practical and efficient solution for homeowners looking to add plumbing fixtures in unconventional spaces. By understanding the components and installation process, homeowners can make informed decisions about incorporating this innovative plumbing solution into their homes, enhancing convenience and functionality without the need for extensive renovations.
What pipe is needed for Saniflo?
Saniflo systems, also known as macerator toilets, require specific plumbing components for installation. Here’s what you typically need:
- Saniflo Macerator Pump: This core component grinds waste into a fine slurry and pumps it away. It’s usually installed behind or within the toilet fixture.
- Pipes: Saniflo systems typically use standard PVC pipes for waste disposal. The exact size and type of pipe needed may vary depending on the specific Saniflo model and your local building codes.
- Check Valve: A check valve is often installed in the discharge pipe to prevent waste from backflowing into the Saniflo unit.
- Electrical Connection: Saniflo units require an electrical connection to power the macerator pump. Make sure to have a nearby electrical outlet or plan for electrical wiring during installation.
How do I connect my Saniflo toilet?
To connect a Saniflo toilet, you’ll typically follow these steps:
- Install the Saniflo Unit: Place the macerator pump behind or within the toilet fixture, following the manufacturer’s instructions for proper positioning and securing.
- Connect the Toilet Fixture: Install the toilet bowl and connect it to the Saniflo unit using the provided connectors or adapters. Ensure a secure and watertight connection.
- Connect the Discharge Pipe: Connect the discharge pipe from the Saniflo unit to the existing plumbing system. This may involve cutting into the existing waste pipe and fitting it with appropriate connectors.
- Electrical Wiring: If not already done, connect the Saniflo unit to a nearby electrical outlet or wire it into the electrical system according to local electrical codes.
Does Saniflo need to be connected to soil pipe?
Regarding the connection to the soil pipe, Saniflo systems are designed to pump waste vertically as well as horizontally, so they don’t necessarily need to be connected to a traditional soil pipe.
However, they do need a connection to the main waste drainage system for proper waste disposal. This can be achieved through various methods, including connecting to existing plumbing or installing a dedicated discharge pipe. Always follow local building codes and regulations when installing a Saniflo system to ensure proper functionality and compliance.
What plumbing is needed for a macerator toilet?
A macerator toilet, also known as a grinder toilet or upflush toilet, grinds waste into small particles before pumping it away to a drain or sewer line. The plumbing requirements for a macerator toilet are different from those of a traditional gravity-flush toilet. Here’s what you’ll typically need:
- Water Supply: Like any toilet, a macerator toilet requires a water supply for flushing. Ensure a water line is connected to the toilet tank or flush mechanism.
- Electrical Supply: Macerator toilets typically require electricity to power the grinder motor. Make sure you have a nearby electrical outlet or consider hiring an electrician to install one if needed.
- Drain Line: A macerator toilet needs a drain line to carry away the ground-up waste. This line can be connected to an existing sewer line or a dedicated sewage ejector system.
- Ventilation: Proper ventilation is essential to prevent odors and allow waste to flow smoothly. Ensure a vent pipe is connected to the macerator toilet system to vent out gases.
- Check Valve: A check valve may be necessary to prevent sewage backflow into the macerator unit.
- Access Panel: An access panel installed near the macerator toilet is a good idea for easy maintenance and repairs.
- Proper Slope: Ensure that the drain line has the proper slope for efficient drainage. Consult local building codes for specific requirements.
- Ground Fault Circuit Interrupter (GFCI): To protect against electrical hazards, it’s advisable to connect the electrical outlet to a GFCI.
Before installing a macerator toilet, always check local building codes and regulations to ensure compliance. It’s also recommended to consult with a professional plumber or contractor for proper installation and to address any specific requirements for your location or situation.
Troubleshooting Common Issues
Even with careful installation, you may encounter issues along the way. Here are some common problems and their solutions:
- Clogging: If the system becomes clogged, check for obstructions in the macerator or discharge pipe. Use a plumbing snake to clear any blockages.
- Noise: Excessive noise during operation may indicate loose components or worn-out parts. Inspect the system for loose screws or damaged components and make necessary repairs.
FAQs (Frequently Asked Questions)
How long does it take to install a Saniflo plumbing system?
The installation time varies depending on factors such as the complexity of the project and your level of experience. On average, it can take a few hours to a full day to complete the installation process.
Can I install a Saniflo system myself, or do I need professional help?
While DIY installation is possible for those with basic plumbing skills, hiring a professional plumber is recommended, especially for complex installations or if you need clarification on certain aspects of the process.
Do Saniflo systems require regular maintenance?
Like any plumbing system, Saniflo systems require regular maintenance to ensure optimal performance. This includes periodic inspections, cleaning, and servicing as needed.
What is the lifespan of a Saniflo plumbing system?
With proper maintenance, Saniflo systems can last for many years. The lifespan varies depending on usage, maintenance practices, and environmental conditions.
Can a Saniflo system handle multiple fixtures simultaneously?
Yes, Saniflo systems are designed to handle multiple plumbing fixtures simultaneously, making them suitable for residential and commercial applications.
Can a Saniflo unit be relocated once it’s installed?
Yes, Saniflo units can be relocated if needed. However, it’s a complex process that may require professional assistance to ensure proper disconnection, relocation, and reinstallation.
Conclusion
Installing a Saniflo plumbing system doesn’t have to be daunting. With the right knowledge and preparation, you can successfully set up a reliable and efficient wastewater management solution for your home or business. Follow the steps outlined in this guide, and you’ll be well on your way to enjoying the benefits of a Saniflo system.

